Pages

Showing posts with label fat quarters. Show all posts

Friday, December 21, 2012

"Swell" Book Caddy


You remember this, right?  "Infanticipating" Lucy asks Ricky to read a children's book to test his English/reading skills.  Poor Ricky is not able to successfully maneuver "...through, cough, bough & enough."  As a result, Lucy hires an English tutor and gets more than she bargains for with "Mr. Livermore":)

I won't go into further details of how closely the above scene resembles our own family dynamics and family reading time, except to say that 'Ricky' is happy for me to do the bedtime stories while he & our little M's listen:)

I've loved reading since I can remember & hope to see our children embrace the wonders of escaping into a literary work, evoking imaginary worlds and creativity far beyond their scope- it's part of what makes childhood such a special place.  So we encourage them by reading aloud:)

While browsing on Pinterest (for a controlled amount of time!) recently, I saw this travel book caddy and thought, "I'm totally making that this week!".


I followed the tutorial with just four tweaks:
  • I top stitched along the upper edges of the book pockets- gives a nice finished look
  • I used fleece interfacing (had a surplus!)
  • I added buttons vs a flower
  • I didn't make my own bias tape!
 I opted to double stitch along the bias tape for added security and since I was in a hurry, it looks a bit "lousy" in a few spots but I don't my little M's will mind:)


I also brainstormed (while sewing) to add an " x box" which ended up looking "lousy", so I added some buttons transforming my "lousy" stitching into a "swell" detail:)


And here is my "swell" caddy with a few board books tucked inside, all ready for it's debut Christmas morning!

Another fabulous project for utilizing fat quarters!

Cost:
Fabric (4 FQs): $4
Interfacing:<$0.50
Bias tape:$1.19
Ribbon: stash resident= free!


 So for less than $6 you can reproduce this "swell" addition to your car for a road trip or just outings around town, keeping your little ones reading:)

Thanks for stopping by,
Tiffany

Friday, November 9, 2012

Candy Cane Lane Wreath


As promised, here is another lovely fabric project featuring the Candy Cane Lane trio of fat quarters- a wreath, made for Sweetstamper in honor of her birthday and another year of crafting success:)

The full instructions are included on the illustrated foldout provided by Stampin' Up! when you order the fat quarters- I just made mine super duper big!


 You'll start with lots if strips- sew a basting stitch down the middle of each, ruffle and pin all around the wreath form, overlapping slightly.  I just love how the ruffles look like little petticoats, all piled together:)

Then you'll cut a bunch of circles using the Big Shot or tracing around a glass, like I did...TIP: since I was making this wreath larger than the original, I upped the size of my embellishments to compliment the overall scale:)


Then grab your handy dandy hot glue gun and plop a dot in the center of the circle and fold in half.  Do this again, folding into quarters and here's what you get:

After whipping up a bunch of these little petals, they're arranged into 'flowers'- I did add some extra glue & twisting action here and there to make my 'flowers' fan properly:)


 Next are the yoyos, topped with buttons- I have a pet peeve about buttons not being threaded.  The end result is ALWAYS worth the time so get that thread ready!


 And here it is, all done!  I loved making this!  I hadn't ever attempted a fabric wreath before & discovered it was way fun, but I especially reveled in making something unique & special for my Mom:)  Should look pretty in her stamping studio:)

Thanks for stopping by!

Tiffany

Thursday, October 25, 2012

Fishies!

  I'm so honored to be sharing a special project over at Sweetstamper's blog today- hop on over to check out my "fishies"!!!

Thanks for looking,

Tiffany

Saturday, October 6, 2012

The "Minnie Bow" Dress

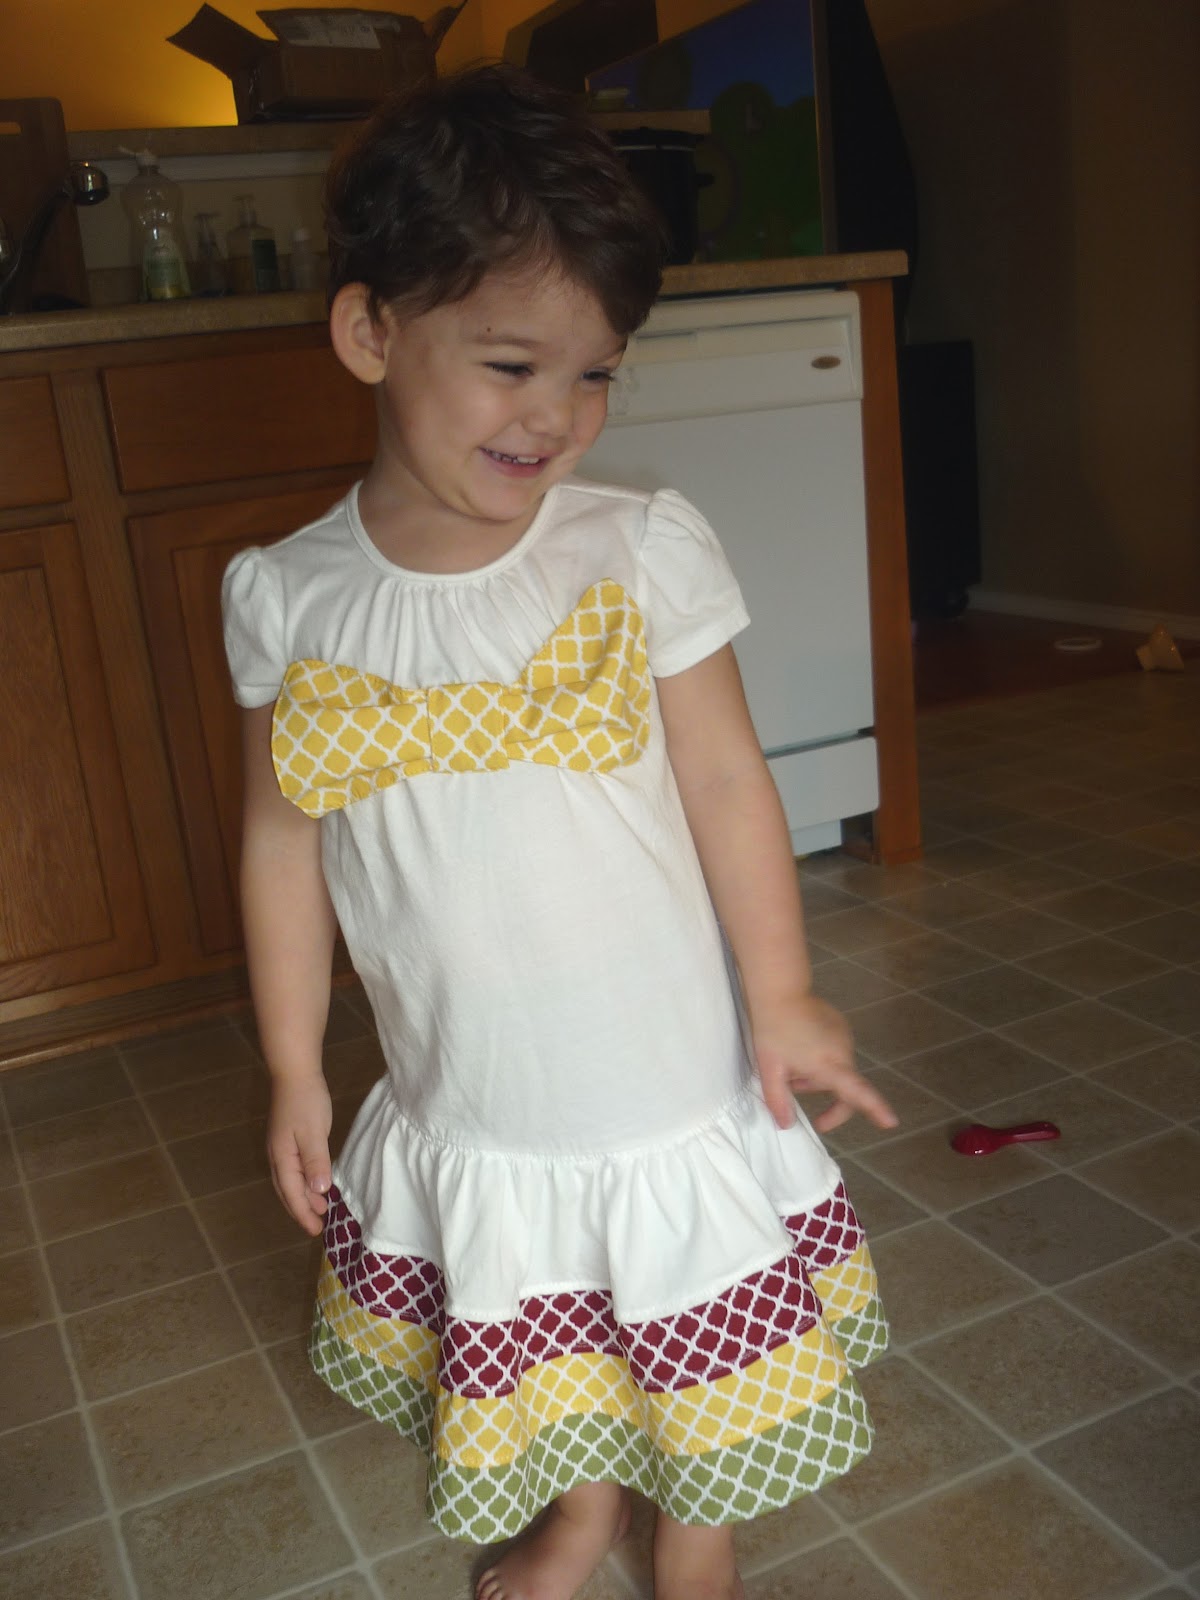
I'm currently working on a stack of crafty projects but since they're gifts for upcoming birthdays & holidays, I haven't been able to share...yet:)  So, I decided to tackle one of Livy's projects this week- a play dress.

I saw a sweet ivory tunic T shirt at GAP a couple of months ago and snagged it for Livy (GAP has super soft Ts) as it was a whopping $4 & I loved the small pleat details on the neck & arms and the flounce ruffle at the base.  I knew this would make a great piece for embellishment- the question was, what to do???  So many options...

I set out to make a "transition into fall" dress with an appliqued pumpkin...but changed my mind, wanting to keep it more neutral, hoping Livy might be able to wear it next spring too.

 Since I'm still a beginner I didn't want to tackle anything too labor intensive and decided on a 3 tiered ruffle skirt using 3 fat quarters from this collection and some sort of applique/embellishment for the bodice...

 I was planning on a fancy flower but when Livy saw me working on her new dress, she asked for a bow and not just any bow, a "Minnie bow"!  Done:)


Once Livy tried on the dress, the bow didn't look as 'bow like' so I plan to readjust it a bit...sigh. Oh well- she's worth it!


I'm also thinking of adding some
daffodil seam binding trim...
maybe around the top of the skirt portion...
 I worked on this little project over several evenings once our little Ms were asleep- it would've come together even faster if I hadn't encountered several sewing gliches.  Since I was working with fat quarters vs fabric yardage I had to piece the panels multiple times and since I was making this up as I went along (is there another way?!) I had to continually develop solutions:)  The flaws aka 'homemade' touches aren't too noticeable though and I had to remind myself that this was intended to be a play dress:)


I also added a lining for the 1st time to ensure comfortable twirling:)


Despite the extra time involved in designing/piecing this little dress, I'm not deterred in the least from using my beloved extra wide fat quarters- they've already made fabulous 'Snack Sacks' and a backdrop for Benjamin's button frame!

Livy & I are thrilled with her new twirly dress and I have yet another tick to add to my check list:)

On to the next!