Pages

Tuesday, March 18, 2014

DIY Minnie Mouse Ears

Back to Livy's Minnie Mouse party preparations...


...DIY Ears!

Let me start by saying this project isn't difficult; just a bit tedious.

I started by looking at this tutorial from a fellow Mom & used it as my guide.


Ideally, I was looking for black headbands to negate the need to cover each band
 but couldn't find them in packs so I settled for these multicolored packs of 6 from Dollar Tree.

We had already bought the "special" sequin ears for the birthday girl 
before I decided to delve into this project:)


I already had the black felt, red polka dot ribbon and my handy dandy hot glue gun on hand, so the first step was to make a pattern for the ears...
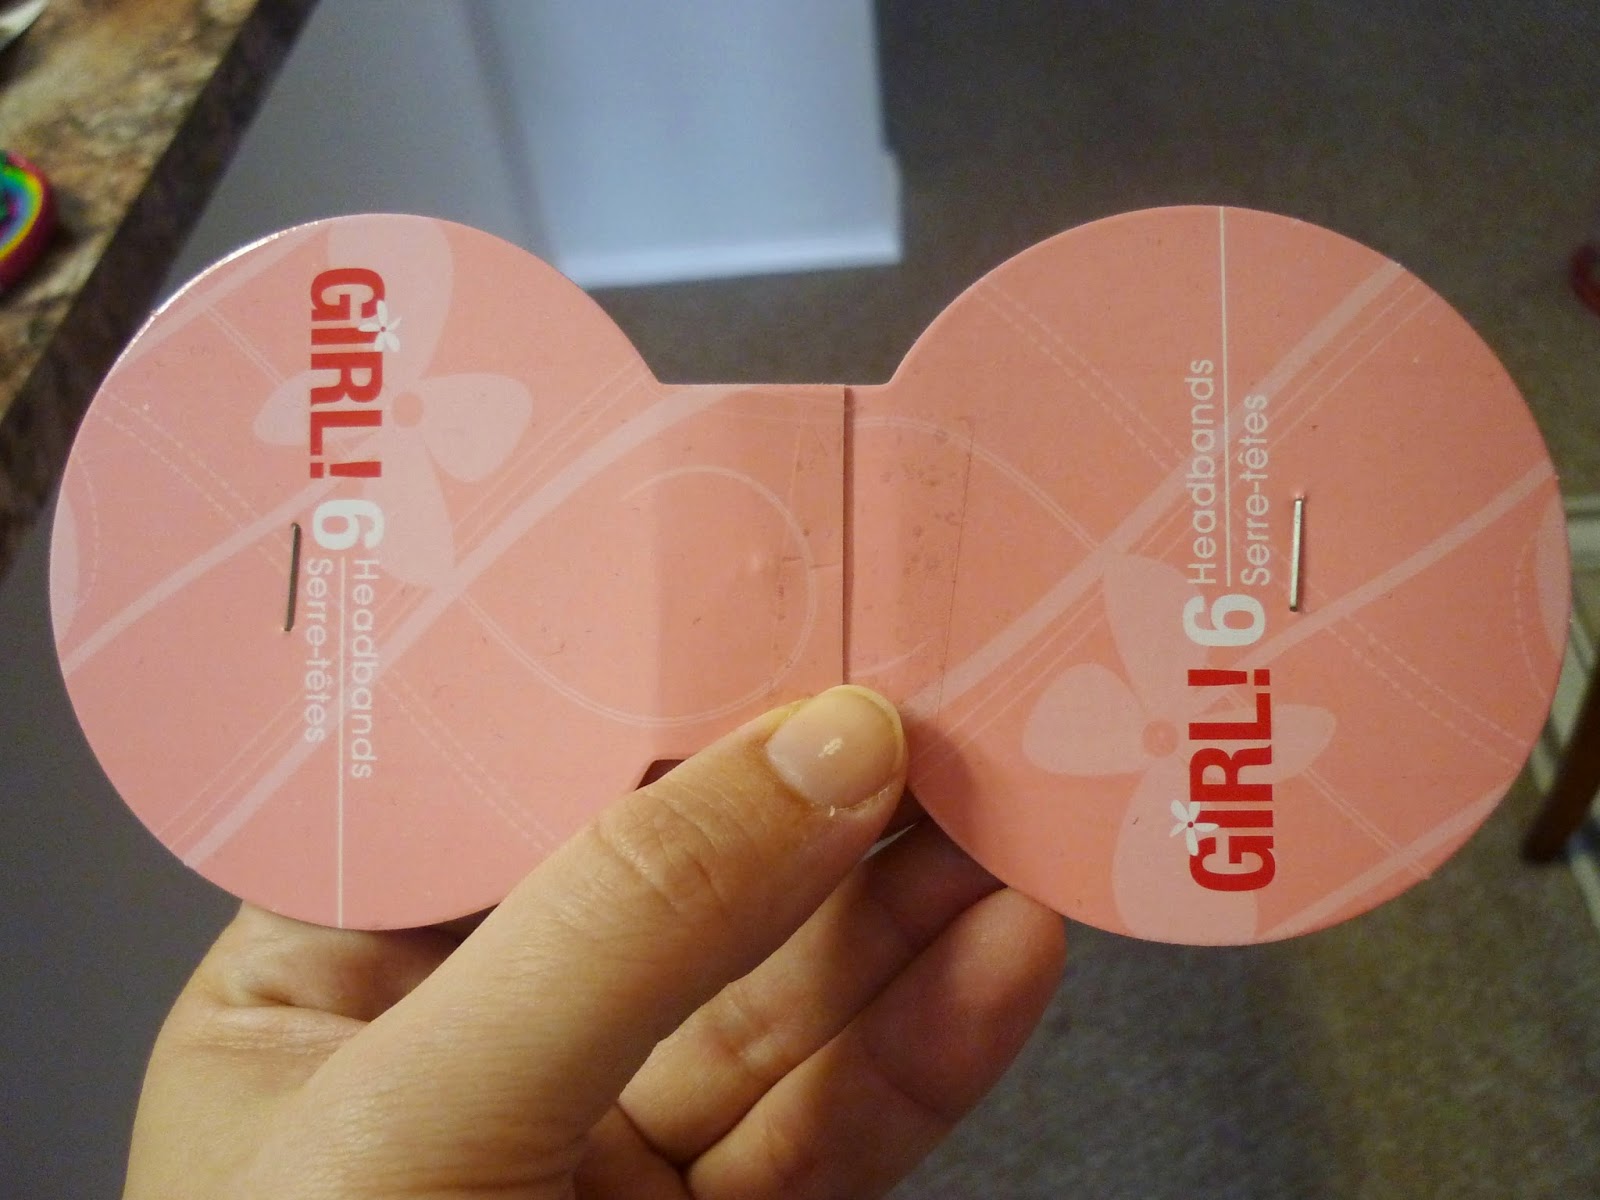

...I found using the headband covers, taped together, formed a great pattern- 
one less thing to make from scratch! 


Next I traced the pattern onto the black felt.  
I can also attest that sidewalk chalk will work in a pinch;)


Now it's time to cut the felt strips to cover the headbands- 
approx 2.5 times the width & add an inch to the length.

TIP: a rotary cutter works so much better than scissors for this step!


Grab some fun foam (or a cereal box!) and cut circles slightly smaller than the ears-
these will reinforce the ears & help them stand up:)


Get your glue gun ready and adhere the cardboard circles to the ears- 
I just used one circle per "ear".


Next adhere the ears together, leaving some room at the bottom to slide onto the headband before being permanently attached.


Time to cover those headbands, the most tedious part.  
I started at one end and gradually added beads of glue along the outer spine, 
pressing the felt in place to smooth the glue.

Then do the same for each side of the felt, 
overlapping and smoothing, running the glue to the end of the felt- 
clip off the ends, even with the headband, for sealed edges.


Finally slide the ears in place and add beads of glue at the base, pinching & pressing.

If you're making Mickey ears, you're done.  
Otherwise, make a bow and attach in place for Minnie:)


I made a dozen and called quits but I'm glad I made the effort...


...the birthday girl was pretty happy...


...and so was our 'Mickey'!

Thanks for stopping by,
Tiffany

Sunday, March 16, 2014

Tea Bag Sugar Cookies


Last week, Gramma hosted a "Downton Tea & Craft Evening" 
and graciously allowed Buttercup & I to tag along:)


And here is Gramma aka "Mrs Patmore", preparing proper English delicacies...


...such as Eccles cakes & miniature Farmhouse Mincemeat cakes- lush:)


Well, I was so psyched about this grand event
 that I pleaded to add a sweet to the spread: Tea Bag Sugar cookies.


To replicate these cookies, start with your favorite roll out sugar cookie recipe.
Then cut strips, notch the tops and using a straw, punch the hole.


Allow to cool completely and then string the "tea bags"- I used baker's twine & Designer Series Paper.


 Lastly I frosted the bottoms with pink candy melts & pink sugar- so dainty:)


Coupled with lovely China cups, the cookies were perfect for this event...


...and enjoyed by some truly elegant "Ladies"!

Can't wait for the next "Downton" evening to share with my Rosebud- 
she already has a taste for proper culture:)

And if you're local, you can come too!
Here are the next dates for the "Downton" Tea & Craft events:
June 5th @ 7pm
Sept 4th @ 7pm
Dec 4th @ 7pm
Contact Gramma for details!

"The Dowager"

Saturday, March 15, 2014

DIY Minnie Mouse Topiary

Preparations for Livy's Minnie Mouse party are still in full swing...


..and I just finished 2 of these!
 This was a first time attempt for me but will definitely be doing these again:)


I started with these little galvanized buckets from IKEA...


...and some floral foam cylinders from Dollar Tree.


In order to temporarily secure the foam,
 I cut up a box and wedged pieces around the foam- free is good:)


Next I took some pie sticks (World Market clearance) & red paper shred (Dollar Tree)...


...to finish assembly!


I also attached some polka dot ribbon to the buckets 
with my handy dandy hot glue gun- polka dot happy:)


And my Little Ms were playing so well as I crafted, making the process much more enjoyable:)


Get the full details on the Minnie Mouse heads here!

Tiffany

Friday, March 14, 2014

Minnie Mouse Favor Bags

I forgot to share these yesterday: Minnie Mouse Favor Bags...


...made with love to hold the pinata loot!


 I found some polka dot wrap at Dollar Tree to cover the 'skirt' portion of plain white craft bags...


...topped it with some scalloped black polka dot ribbon...


 ...& card stock circles to form Minnie's head, suspended with Dimensionals...


 ...and finished with a "Minnie" bow, made with my handy dandy glue gun:)


Simple & easy:)
And these came to approx $0.45 each!


Next up: Minnie Mouse Topiary!

Tiffany

Thursday, March 13, 2014

DIY Minnie Mouse Skirt

So, between our upcoming trip to Disney World & Olivia's Minnie Mouse birthday party, 
the birthday girl was ready for a special skirt to herald these occasions:)


First, I need to make clear that I didn't make this skirt from scratch-
I added the polka layer to a black tulle skirt and reattached the bow in a different place.

The original skirt was purchased at Michael's (of all places!) in their Halloween section for Livy...


...when she went trick or treating as a Ladybug:)

And since I didn't really know what I was doing, I didn't take any step-by-step pics:/
Here's a few pointers though:

1) I took some polka dot cotton (sale at JoAnn's), washed & ironed it.

2) I cut an appropriate length (plus allowances for hems) and used the width of the yardage.

3) I sewed the side shut (RST) producing a large loop, then ironed the seam.

4) I ironed the bottom hem over with RST and then sewed on the outside of the hem.

5) For the waist hem, I ironed over, same as step #4 but I sewed a basting stitch in place so I could gather, pinned and then sewed in place for keeps:)

TIP: Since I was sewing my "Minnie" skirt onto a knit waistband I used a stretch needle.

6) I had snipped the satin bow off the original skirt and then hand sewed to the bottom of the "Minnie" layer.


Done!  Now to get her "special" shirt ready...

Thanks for stopping by,
Tiffany

Friday, March 7, 2014

DIY Minnie Mouse Pinata


See this?


Well, it was created to form the base for my first ever DIY pinata!


I can't believe it but our special girl will be turning 4 in just a few weeks...sigh....


...and she recently became interested in pinatas after watching a Curious George episode...


...so after some pinterest searching, I came across this tutorial from a fellow DIY loving Mom
 and tweaked it a bit.

Here's my version:

Supplies:
White foam board (Dollar Tree)
Black Crepe Paper (Dollar Tree)
Mailing Tape
Craft Glue
Red Polka Dot Ribbon
Hot Glue Gun


I started with white foam board from Dollar $ vs the Huggies diaper box in the linked tutorial- I wanted my Minnie head to be larger than my diaper box would allow.


I used some pot lids to form the circles and cut with scissors, twice for 2 bases- 
a craft knife would have been much easier with the foam but I couldn't find ours:/


Next I unearthed a box that had just the right width to form the sides (thank you previous house owner)-
 it even came with the perfect window for stashing the loot!


I opted to use a flange of cardboard to secure the side piece of the pinata to one of the bases- 
it may have taken a bit longer vs the linked tutorial as I snipped along the flange to ensure proper curving 
but it worked well and seemed appropriately secure.


Here is the side, completely attached at intervals with strips of mailing tape-
 I did roll the box piece along the edge of my dining room table to loosen it up:)


And here is the second base attached on the outside at intervals with mailing tape.  
At this point, the kids & I were quite excited:)

TIP: This is the time to make the holes for the wire to suspend your pinata!


 Next I ran lines of craft glue along the top & sides and pressed in black crepe paper to seal the edges...


...which worked like a charm- this also hid the wire holes.
FYI, I opted to skip the black tissue paper step from the linked tutorial.


Then I tackled the ears, covering the center with a crepe "rosette", all adhered with craft glue.

TIP: By pinching the crepe as its placed on the lines of glue, it forms a ruffled appearance.


  After both ears were filled in, I tackled the "face" and then repeated on the opposite side.


 Lastly, I pressed the crepe paper along the sides
 and then created a ruffle down the center to hide the seam (photo of ruffle not shown).


And now the pinata is ready for loot!
I bought everything at Dollar Tree & Big Lots.


The birthday girl has a special affinity for lollipops
 so I included 2 bags of Dum-Dums & 1 bag of heart lollipops, sure to please:) 


I left a smidgeon of room at the top of the pinata...


...and then hot glued a bow on "Minnie"!

I'm really chuffed about this project and only regret procrastinating about it so long:/

Even with poorly little Ms, I was able to get this done in one day 
with Jonah handing me strips of tape & Olivia sorting the loot:)

Cost:
White Foam Board: $1 (Dollar Tree)
Black Crepe Paper: $1 (Dollar Tree)
Box: free
Adhesives & ribbon: free (my stash)
Loot: $13 (Dollar Tree/Big Lots)
Total Cost: $15

Another successful pinterest party DIY project in the bag!  
And speaking of bags, next I'll share the favor bags in progress:)

Thanks for stopping by,
Tiffany