Pages

Showing posts with label DIY. Show all posts

Thursday, February 20, 2014

Homemade Elderberry Syrup

Confession: I plan more projects than any 2 people could accomplish in one lifetime!

One such project was making elderberry syrup before Abigail was due to arrive...
which didn't happen, obviously!


And now since all 3 little Ms are battling a cold and
 I'm on the tail end of "Larynyitis", I finally got this project completed...
hopefully better late than never:/

What is elderberry syrup?  
This is a great post about elderberry & it's many attributes- 
key benefits: fights multiple strains of flu and builds immunity support- yes, please!


Elderberry syrup can be purchased but it's pricey, hence why I opted to make it:)


I started with organic dried elderberries (Amazon)...


...measured out 1/2 cup of the dried elderberries 
and added to 3 cups of boiling water in a saucepan...


...after simmering for 30-40 mins, there should be approx 1 1/2 cups of elderberry juice- 
allow this to cool and strain...


...and then add 1/2 cup honey.

TIP: Raw honey is recommended but local works too!

Ta da!  Now your elderberry syrup is ready to use- store in the fridge for 2-3 months.

Dosage:
Preventative: 1 Tbsp/daily for adults & 1 tsp/daily for children over 1 year
Illness: 1 Tbsp/2-3 hrs for adults & 1 tsp/2-3 hrs for children over 1 year.

How does my homemade version compare in price?  
About a tenth of the pre-made price tag!  Well worth the few minutes to make:)

Coincidentally, the kids love this as it's so sweet:)

Get well soon,
Tiffany

Friday, January 3, 2014

Peppermint Foot Soak

Now that I shared our homemade canine treats & toys, here's one of the people gifts:

Peppermint Foot Soak

This is a great all natural beginner project using essential oils.

Ingredients:
1 cup epsom salt
1 cup Himalayan pink sea salt
10-15 drops peppermint essential oil (therapeutic grade)

Add the essential oil to the epsom salt in a glass bowl and mix well.  Layer the epsom salt and then Himalayan salt in jars to create a candy cane effect:) 


I chose to follow this recipe, gathered my supplies...

I found the jars at the $ Store & they held approx 1 1/2 cups.


...and layered in jars:)

I found the Himalayan pink salt at Sprouts in the bulk section.


With Baby M's arrival, (more to come!) I ran out of time to make uber cute tags, thus my cheesy print outs pasted to a random sheet of red card stock...sigh...just thankful they got finished!!!

I heart the peppermint sticks & white sweater trim:)

Up next, homemade hot chocolate sticks & marshmallows!!!

Thanks for stopping by,
Tiffany

Friday, October 18, 2013

DIY Candy Cane "JOY" Banner

I know it's "only October" but I'm itching to put out Christmas decor already & so is Livy:)
So, with that in mind, I was thrilled to participate in a recent Stampin' Up! Banners" class, hosted by Gramma...


...where fellow crafters dove into fun supplies & got busy making gorgeous banners!


There were "boo" banners with burlap and black sparkles...


...there were "fall" banners with wooden buttons & gold glitter...


...and there were "joy" banners- I opted to make mine "candy cane" style utilizing the awesome included stencils...

Photo

...vs the equally lovely, jewel toned version with stamped ornaments since I decided to use candy canes as our Christmas decor theme this year:)


To add some bling to my "vintagey" banner, silver snowflakes were stamped on red card stock and cut out using the Sizzix Big Shot...


...and some lovely rosettes (via the Big Shot) were added with silver metallic ribbon curly cues:)


The jute twine helps to keep the look homey & vintage and I just LOVE it!
Can't wait to hang it up!!!

And here's the kit where you can make your own banner- Gramma just finished one for Baby M's room that I'll be sharing soon so sky is the limit on design:)

Thanks for looking,
Tiffany

Monday, October 14, 2013

DIY Maternity Dress Alterartion

During an earlier visit to Goodwill, I thrifted a Motherhood dress, psyched to find proper maternity wear- the fit was ok except that the neckline was really wide and bugged me, requiring additional undergarments which still didn't work well:/

Sorry for the lack of a full length photo- couldn't manage it on my own:/

And then I came across an old black tank top with lace trim that I wore occasionally in college...a very long time ago.


Just imagine the neckline without the lace:/


I simply cut around the neckline of the tank, pinned to the dress and sewed on with my handy dandy stretch needle along the existing hem- I didn't know if this would work, hence the lack of pictures:/


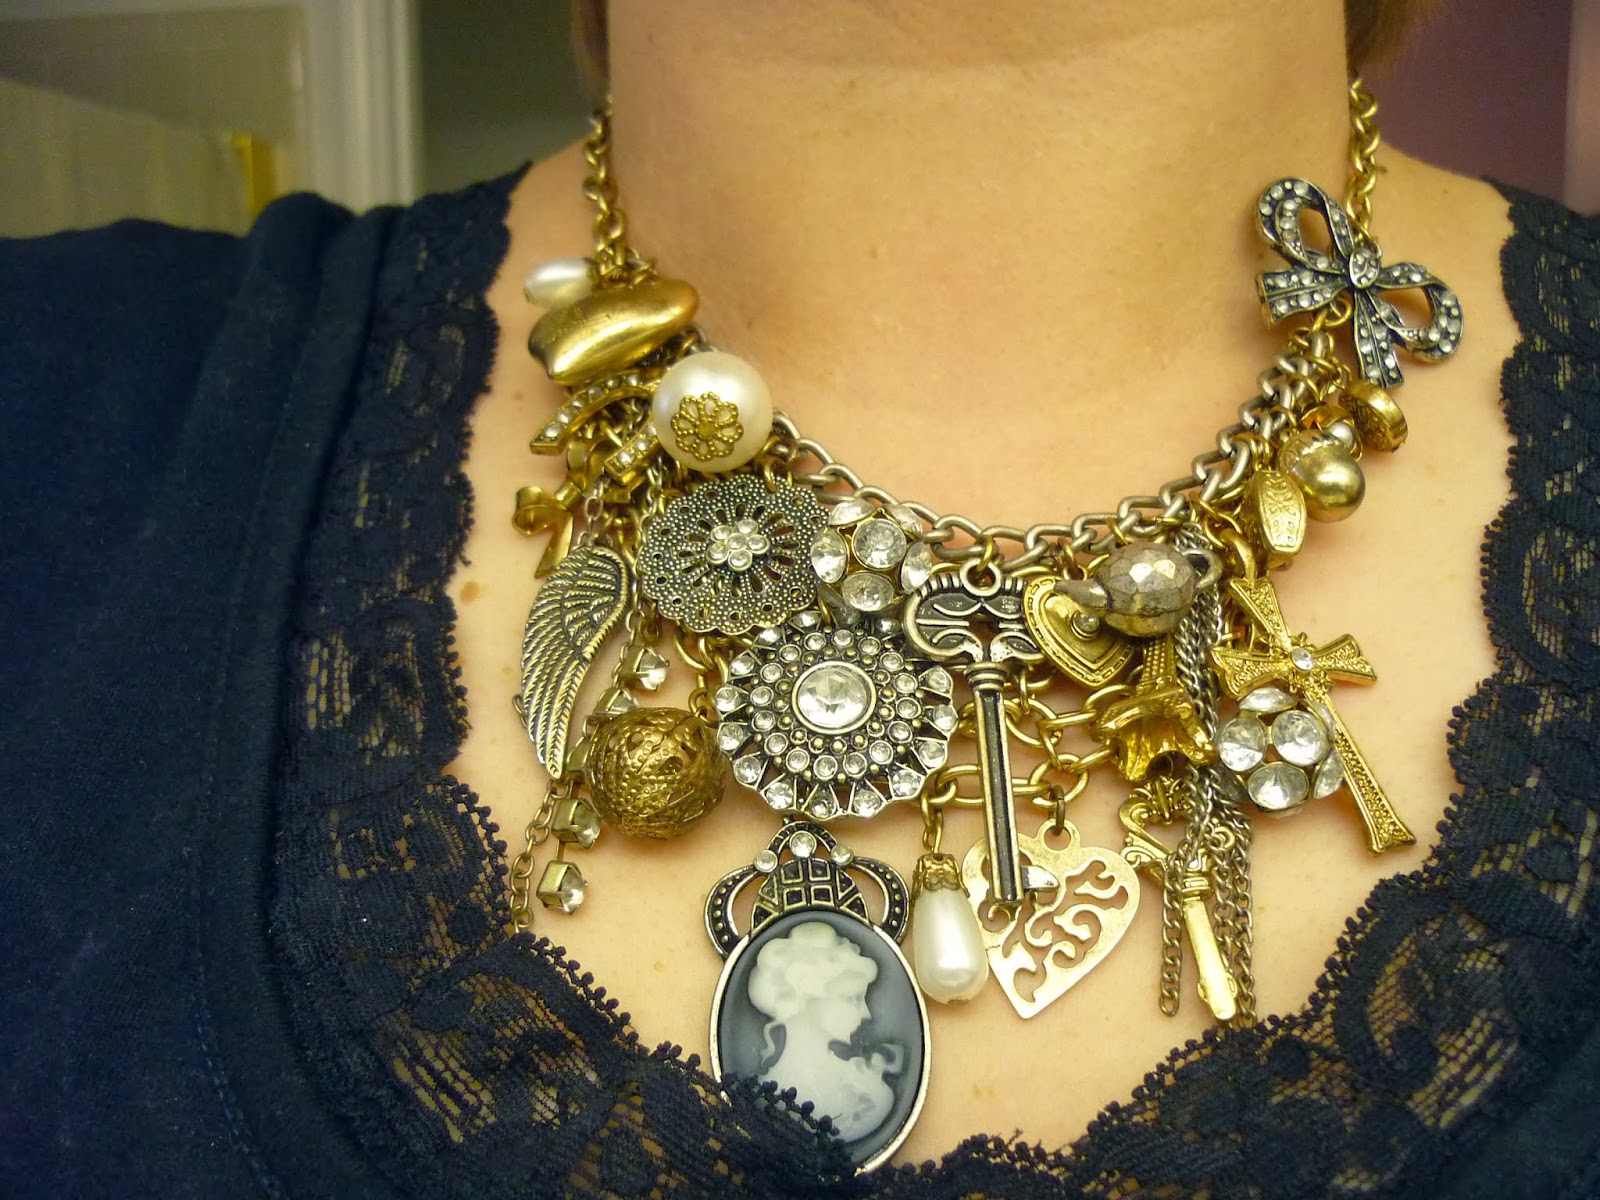
The lace looks like it's always been part of the dress and now makes the neckline modest without needing additional garments...just a chunky necklace!

Cost:
Thrifted Maternity dress: $5.99
Lace Tank top: free
TOTAL: <$6

Thanks for stopping by,
Tiffany

Sunday, October 13, 2013

DIY Maternity Dress Dye

I'm on a bit of a roll sharing my maternity dress makeovers with just 6 weeks left until "D Day"- better late than never, right?!

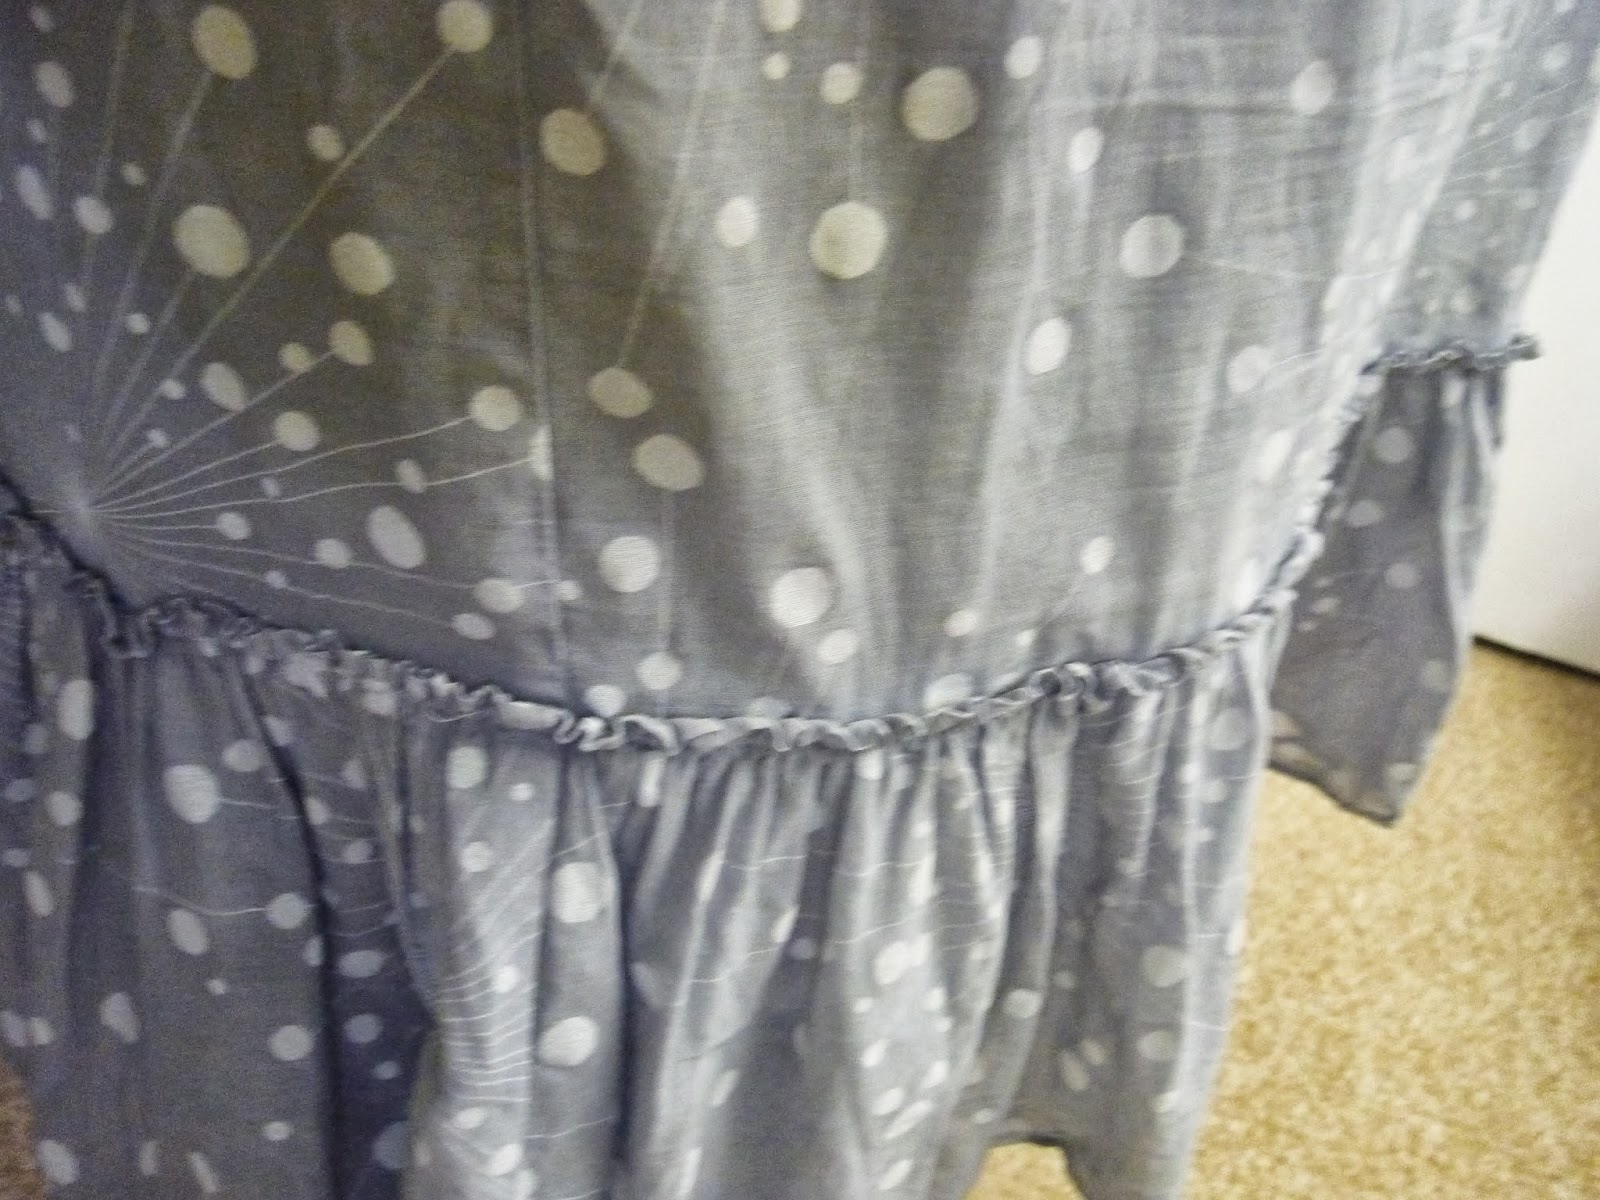
So I picked up a sun dress of sorts (non maternity) at Goodwill that was "chewing gum white" and looked prime for some RIT dye:)  I took my thrifted garment & plunged it into the sink with some "pearl gray" dye- don't forget to add the salt to your dye bath & follow ALL instructions!

Here it is wet after washing.
  And since I started with "white" the transformation took less than 10 minutes:)


Once dry, it lightened to "pearl gray" and since the polka dots were screen printed vs woven, they stayed white:)


The top of the dress included some shirring and a drawstring closure- I always wear a cropped cardi with it due to the spaghetti straps.


More shirring at the waist and then a full skirt, allowing lots of room for Baby M to grow...


...a perfect design, despite not being maternity wear:)

I've worn this a lot, had no trouble with fading & get continual compliments- so glad I took the trouble to "re-do" it:)

Cost:
Thrifted Dress: $5.99
RIT dye: $1.76
TOTAL: $7.75

Thanks for stopping by,
Tiffany

Friday, October 11, 2013

DIY Citrus Infused Vinegar

I recently saw where a fellow Mom was infusing her plain ol' distilled vinegar before incorporating it into her homemade, natural house cleaners...


...so I decided to try it today!


I pushed strips of orange peel into an old juice jar & topped up with my handy dandy distilled vinegar- the solution needs to steep for a week or two and can then be used:)

*Vinegar is not recommended for use on granite, marble & tile.


Enjoy adding some zest to your natural cleaning power:)

Thanks for stopping by,
Tiffany

Saturday, September 7, 2013

DIY Play Tea Bags

A long while ago I pinned some pretend tea bags for play...

Pretend play tea bags for tea parties- made from fabric scraps.  Oh my!
(photo courtesy of pinterest)
...and I finally got them made last night:)

I went through my fabric stash this week, pulling all the scraps aside which served to make these...


...play tea bags:) 

I left some of them with raw edges and enclosed others, stuffing first and stuffing after sewing up the sides, not making any 2 quite the same way...it was late and I felt like experimenting:)


I opted to glue the 'tags' on the ends as my sewing machine was already griping about the tea bags:/

I dithered about saving these for a stocking stuffer...


 ...but then caved in to revealing them now:)

Livy got right down to business, allotting a bag per tea cup...


...while Jonah perked up, seeing a new toy- he was struggling with a cold:(


By this time Jonah was wanting to play...


...so little Ms. Sneaky popped all the tea bags in her teapot...


..."hiding them from Jonah"!


 Next it was time to set up her tea party guests...


...and make an "icky face" at Jonah for getting too close!


"Jonah, shoo shoo..."


Fortunately everyone had their tea and had a blast:)


So glad I took the trouble to sew up these little play tea bags- anticipating hours of fun ahead:)

Play Tea Bag Costs:
Fabric: free (stash scraps)
Polyfill: free (stash)
Mini Rope Cord: free (stash)
Fabric Glue: free (stash)
TOTAL: FREE!!!

Lucy: "Free? F.R.E.E.E.?"  The best kind of project:)

Thanks for checking in,
Tiffany

Sunday, August 18, 2013

The Very Hungry Caterpillar Party- DIY Decor

In honor of our Jonah Rhys turning 2, I chose The Very Hungry Caterpillar as his party theme.  This was my 4th planned party for our little Ms and I continue to learn & re-prioritize each time:)


For Livy's 3rd farm birthday, I put a lot of focus on the activities & food and not much on decor- for my 'hungry caterpillar' I opted to put a lot of effort on decor & not as much on food/activities...


...partly because this is a 2nd birthday, I'm almost 7 months pregnant, still struggling with morning sickness, and partly because I could begin working on decor way in advance, pacing my diminished energy levels more efficiently!


Working on various decor projects over the past 2 months also enabled Livy to help, increasing her enjoyment in celebrating Jonah's birthday & giving her fun new projects to try out!


I started with a simple pennant...


utilizing the Sizzix Big Shot...


...Stampin' Up! card stock & the Crop-a-Dile:)


Then I had Livy help me construct party hats- this was our 1st time adding them to a party...


...and with the leftover polka dot card stock, made another pennant using the Big Shot:)


I also added photo garland for the 1st time...


...having Costco print the pictures and then mounting them on green card stock and
affixing them each with poster putty, swagged on red yarn (leftover from the DIY stick horses).


 I had so many pictures, I added more photo garland giving guests plenty to look at!


Then Livy & I broke into the fun foam, making this piece (backed with a cereal box for support) for the front door to accompany balloons when guests would arrive.


Livy created these butterflies and dabbed some glitter glue for added sparkle...


...that graced the back door on party day:)


We also added a line of foam butterflies below the large photo garland that would serve as an activity on party day:)


 Pinwheels backed the front door and hung scratch free with poster putty:)


 And now for one of my favorite decor elements: polka dot garland!


Starting with some Stampin' Up! card stock and a circle punch...


...these were sewn together in a snap with Livy helping to feed them through the sewing machine...


...resulting in yards and yards...


...and yards of polka dot garland!  Love it!


And with "Ricky's" help, I also created this streamer wall (thanks to Pinterest) which added adequate focus to the food table on party day:)  It took a bit of time to twist carefully and a ladder to attach the tops but with poster putty (my new BFF!) it came out so well:)  Loved it!


And with the mantle laden with DIY favors...


 ...we just had to await guests to arrive the next morning for party day to commence!


Thanks for looking & stay tuned for the final details on Jonah's Very Hungry Caterpillar birthday!

Tiffany