Amid the festivities & activities of this past weekend, Baby M decided she wasn't thrilled with the lack of rest and thus I spent most of Sunday evening sequestered to our bed & the couch in an effort to calm her...
...and as a result, my little Ms & I stayed put at home all day Monday.
We usually enjoy at least one day a week at home but I'm usually doing lots of laundry, cooking, sewing, crafting etc...so not much rest in the mix:)
This particular Monday however, I purposed to not do any laundry, cooking or sewing and spent extra time working puzzles, assembling Mr. Potato Head, watching Mickey Mouse Clubhouse and keeping my feet up as much as possible...
...I wasn't looking forward to a "dud" day but found that I enjoyed it immensely! Everyone was far more rested & relaxed by the next morning, proof of success:)
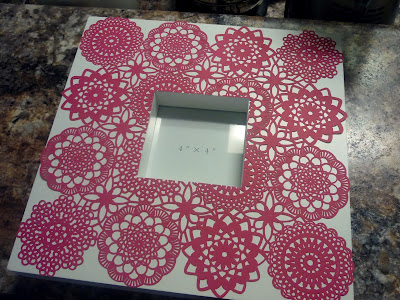
I did manage to squeeze in one little craft though- a DIY doily frame for Livy's room makeover:)
I started with this great frame, purchased from the Stampin' Up! clearance rack awhile back...it's approx 12x12...
...making it an ideal base for some Designer Series Paper...
...especially this beautiful laser cut doily pattern- love it:)
After cutting out the center 4x4 square with scissors, I simply adhered it to the frame with a glue stick! Easy!
Olivia is thrilled with another piece being added to her evolving room decor and is now helping me decide on a picture to enclose:)
And this frame perfectly coordinates with Livy's new DIY bedspread- details coming:)
Thanks,
Tiffany


No comments:
Post a Comment