Pages

Friday, November 1, 2013

DIY Accessory Organizer, Take 2!

I previously made a hair accessory organizer for Livy's room and it has functioned well, adding to Livy's room decor...


...but since we were updating her bedroom decor, I opted to update her organizer too:)


First step was to strip all the old ribbon & hair clips off, once again starting from scratch with this "tweet" birdcage base...


...then I updated the ribbon with this bold stripe, complimenting Livy's new custom bedspread & custom curtains:)


Sorry for the shady pic- here it is with some of her hair clips attached.  The ribbon provides a welcome pop of color until we get her bedroom walls painted and the looped bow on top is as far as I got to completing this...Livy doesn't mind:)

I'm now working on one for Baby M's room...

Thanks for stopping by,
Tiffany

Thursday, October 31, 2013

So Long Summer

Earlier this month, "Ricky"  was headed to Fredericksburg on a day trip for work- the kids & I went along as stowaways...


...and discovered a nearby playground...


...complete with a big slide...


...that my little monkeys greatly enjoyed...


...many times over!


Then we went exploring...


...discovering a "ferris wheel"...


...some lovely flowers...


...and another look at the "ferris wheel"!

About this time, "Ricky" met up with us for a picnic lunch before we headed back home, making it a wonderful farewell to the summer temps:)

As a young girl, I remember enjoying many picnics as the family trekked all over England with my Dad who often traveled for work- it was special to replicate this for our little Ms, even on a small scale:)

Looking forward to more day trips & picnics, in cooler temperatures, once Baby M arrives:)

Welcome fall!

Wednesday, October 23, 2013

Pumpkin Patch

This past weekend, we made it to a pumpkin patch:)


Our usual pumpkin patch destination is approx 1 hour away on a large farm and since Baby M is just 4 weeks from her proposed due date, we opted to stay a bit closer to home this year...


...and found a Methodist church just 5 mins away with a terrific pumpkin patch...


...complete with tons of mini pumpkins & gourds...


...just the right size for little hands...


...tiny tables for organizing...


...and a tractor ride!


Livy hung on to Jonah during the bumpy tractor ride to ensure he felt safe- sweet moments:)


The weather was perfect, everyone had a great time and I didn't have to trek over hill & dale to ensure my little Ms played in a pumpkin patch this year:)

Happy harvest!

Saturday, October 19, 2013

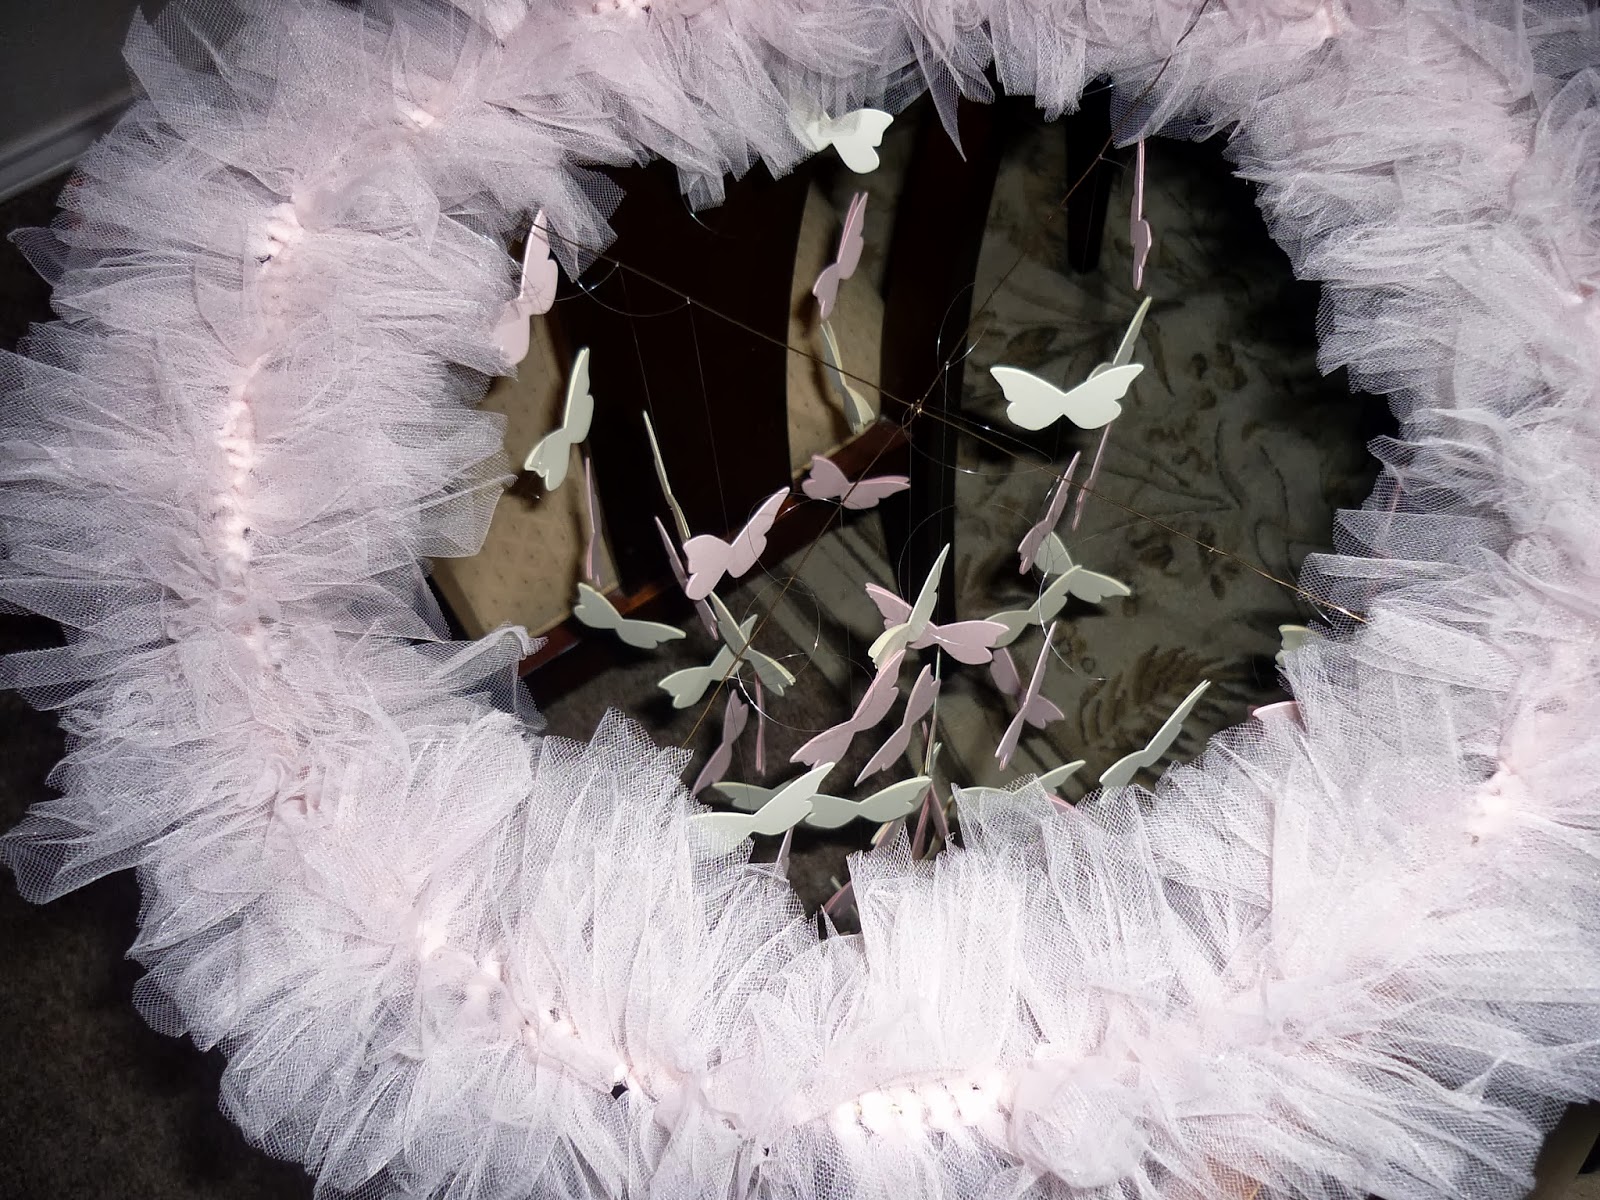
DIY Butterfly Mobile


It's finally done!  Another pin completed!
 mobile
I saw this mobile on Pinterest & decided to try my hand at making it for Baby M's nursery, knowing it would coordinate with the Beatrix Potter decor really well:)


I would like to go on record as saying this project was a labor of love & not for the faint of heart, however it was 100% free so very satisfying:)


I discovered this wire frame next to a neighbor's recycling bin right before we moved and snagged it in hopes of reproducing a Pottery Barn style canopy for Livy's bedroom- ended up buying that at IKEA so it sat in my craft pile until I saw the butterfly mobile pin:)


I think the frame was originally part of a lamp shade as it was very sturdy and had a 'dip' on one side- I simply attached my wire to the side and had no problem with balance.


Then I cut a ton of butterflies (2 at a time using the Stampin' Up! Bigz Butterfly die & the Sizzix Big Shot) out of "very vanilla" & "pink pirouette" card stock.
I then attached 4 butterflies to lengths of transparent thread with mini glue dots- the original tutorial calls for fishing line which might be easier to work with...the transparent thread was very fiddly but I had it on hand:/


Then I found some pale pink tulle (leftover form our wedding!), cut into short pieces and began tying onto the frame...


Almost 10 minutes of cutting & tying resulted in this much of the frame covered...sigh...


...so speeding things up a bit, I had half the frame covered in about 30 minutes- I placed my knots very close together to make it as full as possible.  The original version was not near as full so its based on personal preference/materials.


Peanut entertained herself by hiding in the mounds of chocolate tulle from our wedding...


...that will be utilized for her next birthday:)


 Phew!  Finally done & Livy discovered Baby's mobile made a great base for a hat:)


Next I began attaching the strings of butterflies, fluffing, straightening, fussing etc...


...and  found balancing the mobile frame on the backs of 2 dining chairs very helpful in this step.


 Then I tied some tulle around the frame in 4 spots, made a knot and attached to a hook in the ceiling, above Baby M's crib...


 ...here is the view from the crib...


 ...and here is the view from the glider where we will be spending a lot of time:)


I'm really hoping Baby M enjoys this DIY creation- it was made with much love:)

 For full details, check the original tutorial- I tweaked a bit for my supplies.

Cost: FREE!

Happy creating,
Tiffany

Friday, October 18, 2013

DIY Candy Cane "JOY" Banner

I know it's "only October" but I'm itching to put out Christmas decor already & so is Livy:)
So, with that in mind, I was thrilled to participate in a recent Stampin' Up! Banners" class, hosted by Gramma...


...where fellow crafters dove into fun supplies & got busy making gorgeous banners!


There were "boo" banners with burlap and black sparkles...


...there were "fall" banners with wooden buttons & gold glitter...


...and there were "joy" banners- I opted to make mine "candy cane" style utilizing the awesome included stencils...

Photo

...vs the equally lovely, jewel toned version with stamped ornaments since I decided to use candy canes as our Christmas decor theme this year:)


To add some bling to my "vintagey" banner, silver snowflakes were stamped on red card stock and cut out using the Sizzix Big Shot...


...and some lovely rosettes (via the Big Shot) were added with silver metallic ribbon curly cues:)


The jute twine helps to keep the look homey & vintage and I just LOVE it!
Can't wait to hang it up!!!

And here's the kit where you can make your own banner- Gramma just finished one for Baby M's room that I'll be sharing soon so sky is the limit on design:)

Thanks for looking,
Tiffany

Thursday, October 17, 2013

Puddles & Pictures

Last year I made a fall ensemble for <$10 that Livy loved and since I made it a smidgeon big, she was able to wear it again to church this past week!


I picked up some new pink tights (Lands End clearance) and found some gold sequin shoes in our favorite resale shop to update her look...rather like some of those myself:)


She was so happy to play with her "ferris wheel" flower (it spins on the attached snap) and sport her "new pink tights" with her "sparkly shoes"!


It was raining so we ducked outside for just a moment to try and snap a picture, which she didn't mind...


...until she got hit with some sprinkles...


...and then she was ready to go back inside:)


I'm so happy to see this little ensemble, made with much love, getting a bit more use:)  
Thumbs up for learning new skills (still a novice seamstress) & for handmade goodness!

Thanks for stopping by,
Tiffany